 Directions
Is it free to enter? YES for kids!
Nominal charge for:
OAPs
NHS
Locals (SY Postcodes)
Refugees
Food Bank Users
Armed Forces
Blue Badge Holders
Carers
Facebook Top Fans
£6.00
KIDS ALWAYS FREE!
Routine Adult Peak Season Charge: £8.50
Are you open on a Saturday? YES!
Do you allow dogs? YES!
(All outdoor spaces and outdoor café area)
Something for all the family!
(Please refer to our terms and conditions for more information)


We have put together this installation guide, as an example of how to put together your metal gazebo!
This guide applies to all of our metal gazebo range, but we are offering a close inspection to our cream finished “Lady Leticia’s Dream Carousel” Bandstand Pavilion, which is available in the following sizes:
3.4m
4.4m
6m
Custom size
Please note, these dimensions refer to the diameter of the item.
As with all our larger products, we recommend a designated professional to help to install your metal gazebo, to ensure it is well within the Health & Safety regulations. With some instances, we do offer aid ourselves if this cannot be provided by yourself. . Should you have any further questions during your installation process, feel free to get in contact with us on 01691 610952.
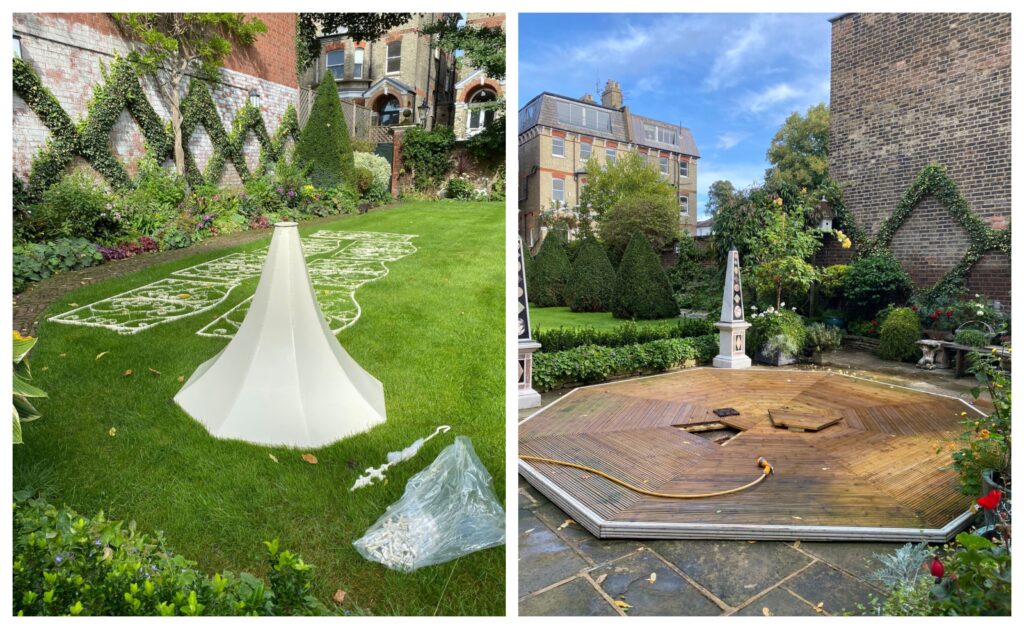
A Visual Guide to Installation
Our stunning metal gazebo structures are the perfect addition to any outdoor garden space, there is no better way to show off to your friends and family during an event than through this touch of class and elegance. Plus, they provide much needed shelter from the unpredictable British weather!
In terms of installation, there will be some attached images to show how the stages come along during the construction process.
Firstly, it is key to ensure you have all required elements and parts prior to getting started. Once this is done, the marking of space can be done to allow for the bottom layer to be installed. From here, we can begin the installation of the metal structure, and bring your garden to life!
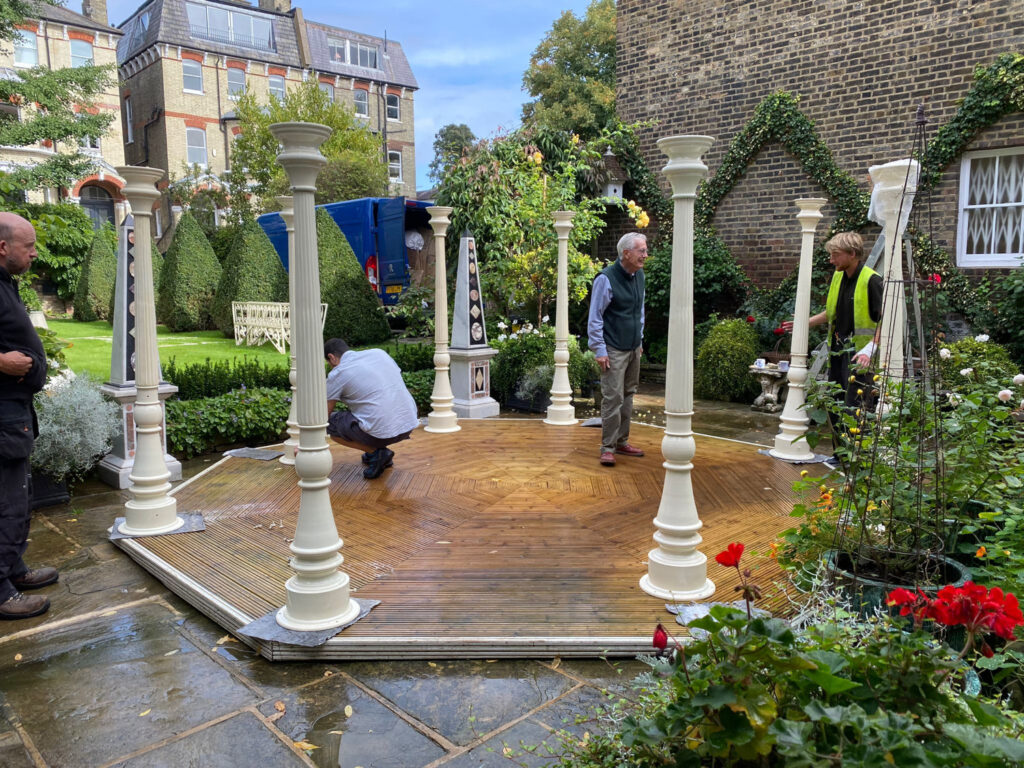
After this stage is complete, construction of the surrounding pillars can begin. This acts as support structure for the ensuing metal framework, alongside the roof which is one of the final steps. For this particular structure, there are 8 veranda supports tp surround the item.
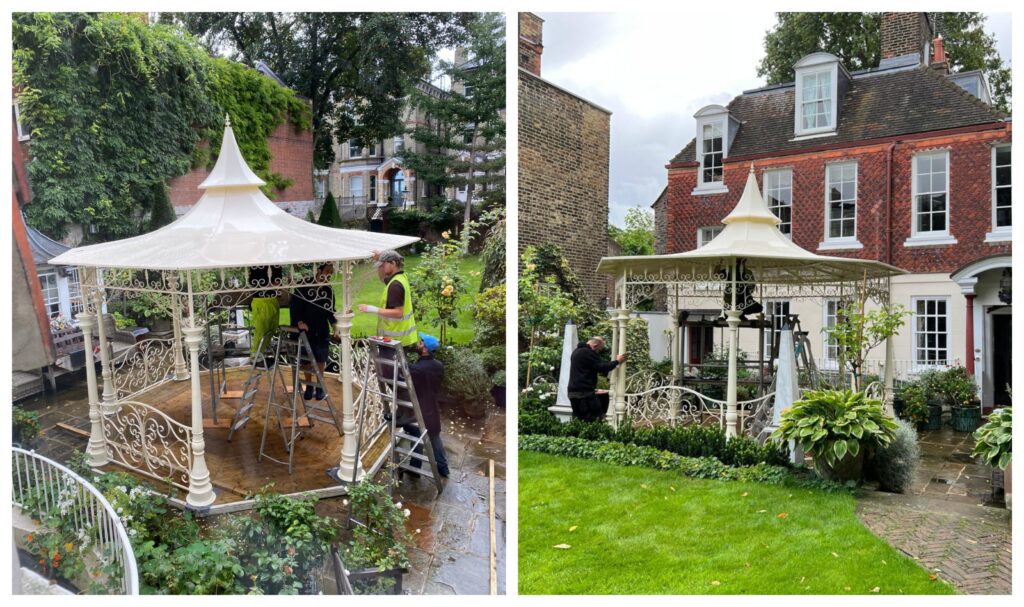
Once these are in position, the next stage can begin. This includes the additional spiral metalwork that surrounds the structure, as well as the beginning of the installation of the roof. These parts are those pictures in the first stage, this is where the aid from a designated professional comes in play. This part can be particularly fiddly to ensure all items are in the correct place. But after this, the structure should start to take place.

We are now approaching the conclusion of the visual aid for the installation guide. Once the roof has taken shape, and all necessary parts are securely in place, a few final tweaks might be necessary to ensure it is securely in place and adheres to the Health & Safety Regulations. These final two images showcase the final touches necessary, as well as how the product will look once fully installed in your garden.
Of course, if you have any issues regarding the installation of your metal gazebo, please do give us a call on 01691 610952, or email across to info@britishironworkcentre.co.uk.
Shop the Range
 Click Here
