 Directions
Is it free to enter? YES for kids!
Nominal charge for:
OAPs
NHS
Locals (SY Postcodes)
Refugees
Food Bank Users
Armed Forces
Blue Badge Holders
Carers
Facebook Top Fans
£6.00
KIDS ALWAYS FREE!
Routine Adult Peak Season Charge: £8.50
Are you open on a Saturday? YES!
Do you allow dogs? YES!
(All outdoor spaces and outdoor café area)
Something for all the family!
(Please refer to our terms and conditions for more information)

We have made putting together your new lamp post even easier with the following guide.
Please note we always recommend a qualified electrician is used for Lamp Post installation. Recommendations are subject to modifications due to individual circumstances, such as ground type, exposure and environment etc. The viability of the lamp post and location must be assessed by a qualified electrician ensuring it is suitable, making necessary modifications to the location or lamp post where required. All products are supplied unwired in easily assembled components unless specifically stated. The fully constructed item must have appropriate earth bonding and protection against overload. A qualified electrician should inspect and test equipment before final connection. A test certificate should be supplied by your electrician to prove that completed installations comply with current wiring regulations (i.e IEE Wiring Regulations – 18th Edition 2018).
The information provided is based on residential use and may vary in commercial applications. Products are not IP tested unless specifically stated.
Below we have a step by step guide for a slightly more advanced lamp post installation method. This is typically called an “All-Thread” fitting method.
In the video below, we detail and recommend the best light bulbs for our lamp post and lanterns.
History
The illumination of street lights was down to the work of a Victorian lamp lighter. With a ladder and ignition lamp in hand, these were thought to be trustworthy men as they played an important and highly essential role in the city and to all those that lived there. Often seen just before dusk, the lamp lighter would rest his ladder against the specially constructed horizontal bars, known today as ladder bars, to support himself as he climbed. Once lit, he would move onto the next lamp post. He would continue this around the city and at dawn, would extinguish the light in the same way.
Nowadays, these traditional lamp posts have only a single change, they use electricity rather than gas. Here at Black Country Metal Works we pride ourselves on our closeness to traditional lighting, from the ladder bars which are now just used for decorative purposes, to the built in bulb holder which would have replaced the gas switch, each one of our lamp posts gives a nod to the history and ancestors that came before it.

Installation
Please note: The British Ironwork Centre cannot take any responsibility for improper installation.
Our Lamp Posts are generally supplied in three sections:
1) Lantern
2) Lamp Post
3) Central pole section
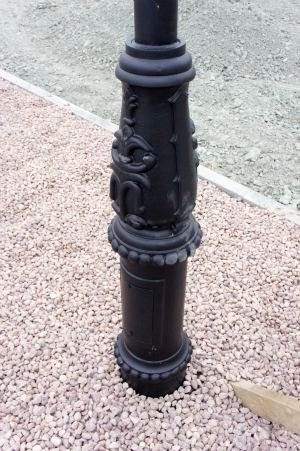
In order to assemble the post, you slide the central post section into the base, until it firmly meets the shelf. Once in place there are four locking points which hold the pole in place. These can be tightened using the special hex key provided. The hex key can be found packed with your lantern head.
The second stage is to place your lantern over the collar at the top of the post (ladder bar end) and again tighten with the hex key provided. The trades person installing must ensure all fixings are tightened and that the column is securely attached to the base. We recommend nothing is tied to or applies horizontal pressure on the pole which may strain or damage the fixings at the base.
1) Firstly dig the necessary trench from your desired Lamp Post installation area to your power supply. Depending on the height/weight an educated decision should be made as to the depth of base needed to support the lamp post in place. Typically the pad size is between 2-3ft cubed, using a root anchor if the ground is of an uncertain quality.
2) Into the trench place your conduit which has already been threaded with electrical cable.
3) Ensure the conduit rises out of the concrete pad central to your lamp posts final location (you may want to use a 90-degree conduit elbow) and pour the cement mixture into the base area. Allow the cement sufficient time to completely harden.

4) Once hardened, the Lamp Post should be erected and using a small masonry drill bit the fixing points marked onto the ground. Once marked using the full size masonry drill bit, drill 4 holes into the cement base. The masonry rawl bolts are typically M10 size, please check the specific bolts as this may vary depending on availability.
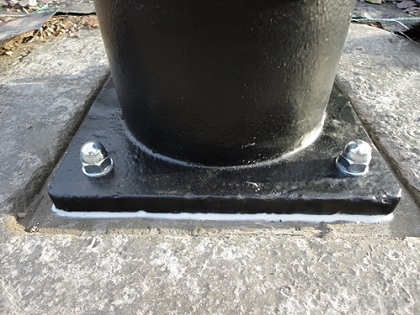
5) It is now time to tap your expanding masonry bolts into place. Remember to do this gently as it is very easy to un-thread the nut which allows the bolt to tighten. Typical raw bolt hole depth is the entire length of the raw bolt. Once in place the Lamp Post base can be placed back in position over the 4 holes and the bolts tightened. Due to the nature of the bolts they will expand into the concrete base when tightened and should not be used at the edge of the base due to their expanding nature.
6) An alternative installation procedure whereby threaded bar is set directly into the base may be used by your trades person when required.

7) Once installed we advise covering all stainless steel fixings, masonry raw bolts and any chips or scuffs with a metal based paint, to complete the look and seal any areas exposed to the elements. For more general maintenance, please see the maintenance link in the footer of the website.
8) Stand back an admire your Lamp Post fully installed. Complete an assessment ensuring everything is secure and safe.
9) Instruct a qualified electrician to complete all electrical installation and testing works as per earlier in this document. Request your electrical installation certificate.

Please note we always recommend a qualify electrician or trade professional is used to install your lamp post. We cannot take any responsibility for improper installation.
The ladder bars on all lamp posts are purely for decorative purposes and should not be used with an actual ladder. we always recommend the use of an appropriate A frame ladder or scaffold towers. The Lamp posts are not designed for leaning against, climbing or areas with high winds. The lamp posts are designed primarily for residential use. In commercial environments we recommend reinforcing the lamp post by welding separate components together.
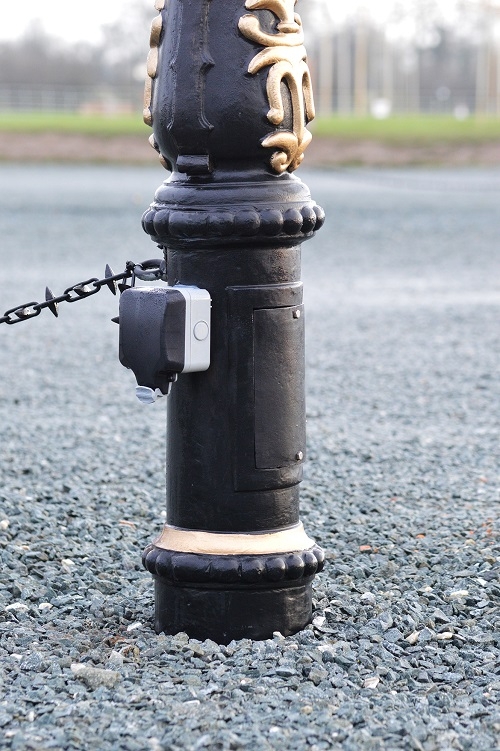
As shown additional electrical fittings maybe added by your electrician. Shown below we have the lamp post base featuring an IP66 waterproof socket outlet.

As our swan neck style lanterns have a roof mounted bulb configuration and so some extra installation measures are typically taken by the electrician during wiring. These are only examples and your installer may modify further as is seen fit. As shown in the images below, the cable entry point should be sealed using a locking nut, washer and grommet.
Your electrician or tradesperson can then apply a layer of silicon to completely seal the cable entry point. As shown the silicon used is typically black. Silicon can also be added to the inside of the lantern where the bulb holder stem meets the lantern roof, as pictured below.
Shop the Range